6.21.2012

Raw Zucchini Pesto Pasta Salad

Similar to the marinara version of raw pasta, this is a yummy and lower-calorie version of pasta. This is great on a hot summer evening as you don't have to heat up the kitchen! And this would be good as a cold salad at a potluck.

I use normal pesto in the link below, but you could easily make a raw vegan pesto (i.e. remove the cheese!) to make the whole dish completely raw and vegan.

Method:
Slice zucchini into thin strands (use a spiralizer, julienne slicer, or resort to a mandolin or veggie peeler and knife).  If you have really picky people, you can remove the skin first but I like it with strands of the green skin showing!  The "noodles" look like this:

Toss with pesto, and chopped sun dried tomatoes. Serve immediately.

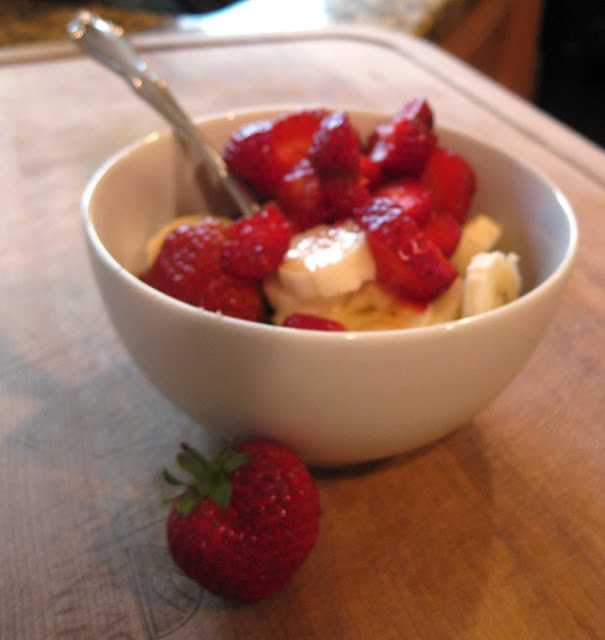
Hood Strawberries are dreamy

It's strawberry season! Picked 25 pounds of Hood strawberries last weekend with a friend. Then the following weekend I picked another 30 pounds!  I'm a notoriously fast berry picker so it took about an hour.

At $1.50 a pound for u-pick, it is a third of the price of already-picked berries at the farmer's market.

Enjoy strawberries:


Strawberry Fruit Leather (nothin' but fruit!)

 When you've got too many berries, or soft squishy berries, fruit leather is a great way to use up and preserve the extra! And the result is easy to pack for work/school snacks, hiking or road trips.  I did these with strawberries that I picked for $1.50 a pound!

Method:
Puree fruit/berries until smooth. You may need to add a little water to get it started.

Some folks add agave, maple syrup or honey to sweeten, but I think fruit is generally sweet enough! Plus too much sweetener will make it difficult to dehydrate all the way.

Pour approx 1 to 1.25 C puree onto a 14" x 14" dehydrator tray, lined with parchment, plastic wrap or teflex sheet.

Spread it out to cover the tray- making the edges slightly thicker than the center. This is unintuitive, but I learned it from the Excalibur Dehydrator book and they are right! the reason is that the edges dry faster than the center. If the edges are thicker then they don't get crunchy by the time the center is dry.

Dehydrate at 115 degrees for 6 hours or as long as it takes to get a fruit leather consistency. Don't overdry or it will be crispy.

Pull the finished fruit leather off the dehydrator trays, transfer each sheet, one by one to a cutting board, sticky side down.

Slice into 1-2 " thick strips. (If you roll and then slice the layers get all stuck together).

Then roll up, with the sticky side facing out (it seemed easier to roll this way).


Shiso Chia Lemonade

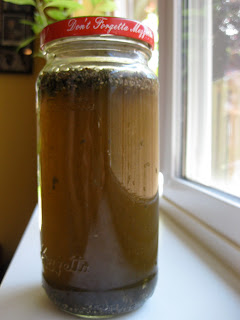
I'm a fan of shiso, the Japanese herb otherwise know as "perilla". I have a red shiso plant in the yard (since you can't find decent shiso in stores!) and decided to use it for an herby lemonade drink. This is more like lemon water, but you could add agave or sugar to make it sweeter.

Shiso Chia Lemonade
Blend 2-4 leaves red shiso with 1-2 C water and 1 TB of lemon juice

Strain and discard shiso fibers. 

Add 1 tea chia seeds, stir and let chia soak in the liquid, about 5- 10 minutes.

Enjoy!


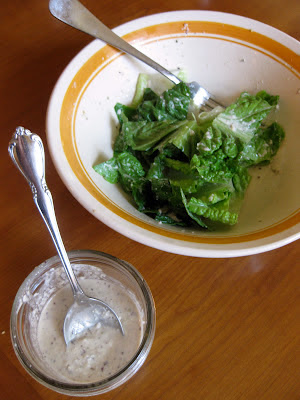
Raw Vegan Ceasar Dressing


I've tried many raw/vegan ceasar and ranch dressings and finally sought out to make my own. This is my favorite- it is a dead ringer for the garlicky ceasar dressing they use at New Seasons, without the milk products!


A half batch makes a little less than a half pint (small canning jar) which is perfect for a few salads. However, it will blend better if you do a full batch (which you may have to freeze the other half).


Use on romaine lettuce or other greens (or steamed veggies) and then sprinkle some extra coarse salt on top (recipe isn't too salty so you can add some crunchy coarse salt on last).


Half Batch Vegan Ceasar Dressing
Blend until creamy:
0.25 C cashews (raw/unroasted)
juice from 1/2 small lemon 
2 TB olive oil
2 TB water
1 clove garlic 
4 black peppercorns
0.25 tea salt
0.5 tea  kelp flakes (dulse or other kelp is fine)
0.5 tea oregano flakes


Full BatchVegan Ceasar Dressing (easier to blend in blender)
0.5 C cashews (raw/unroasted)
4 TB olive oil
4 TB water

2 cloves garlic 

8 black peppercorns
0.5 tea salt
1 tea  kelp flakes (dulse or other kelp is fine)
1 tea oregano flakes


Vegan Ceasar Salad toppings:
  • Crutons, flatbread or flax crackers
  • Dried herbs like Penzey's Parisien spice
  • Thin sliced onion
  • Raw Vegan "parmesan sprinkle" (Cashews, salt & garlic powder)

6.12.2012

Ranch Zucchini Chips (raw vegan)

I've made this a few times- always surprise myself how good these are. They changed my husband's mind about zucchini!!  They make a low calorie, vegetable-based, crunchy snack that can be stored in a desk drawer.  Inspired by this recipe.

Size up or down the seasonings so that you get the zucchini seasoned-- it's pretty flexible. 

Method:
Thinly slice zucchini. I usually do a couple cups of slices (2-3C?)

Toss zucchini slices in a bowl with marinade:
1 TB lemon juice
1 TB olive oil

1/2 tea salt
1/2 tea garlic powder
1/2 tea onion powder
1/2 tea oregano
 
1/4 tea pepper
1/4 tea paprika1/8 tea chili pepper

Lay marinated zucchini on dehydrator sheets.

Dehydrate at 145 F for first hour. Reduce heat to 115 and continue dehydrating 6-10 hours until crispy. Store in airtight container.

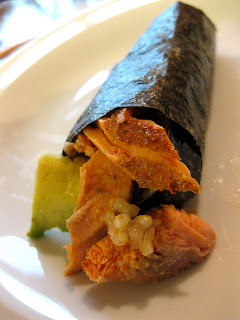
Brown Sushi Rice & Smoked Salmon Avocado Temaki (handroll)

Never really seeing temaki (手巻き) here in the States, I fell for these in Tokyo.   My favorite sushi restaurant, , has (or used to have?) a special one night a month for 100 Y per hand roll!  In Japan, people sometimes throw temaki dinner parties, where the guests assemble themselves (since temaki are easier than normal maki/rolls).  


Brown Sushi Rice Method
There are so many rules when making sushi rice (or doing anything with Japanese ingredients or utensils!). Some are really important and others not-so-much (for example, I can't force myself to wash and strain the rice 4 times). 

I enjoy this blog and mixed her recipe with what I learned from my host mother in Tokyo.  Here's how I like to make sushi rice. Note: I like my rice really seasoned-- you could use the same quantity of vinegar mixture below with 3-4 cups rice!

Put 1.5 C short grain brown rice and 3 C water into rice cooker and set it to cook.

Meanwhile, stir the following in a pyrex (or other microwave-safe) cup:
1/4 C komezu (rice vinegar)
1 TB white sugar
0.5 TB mirin (or sake)
0.5 TB kosher salt

When the rice is nearly finished cooking, heat the vinegar in microwave for 30 seconds. Then stir the mixture until salt/sugar are dissolved.

Once rice is done cooking, scoop it into a shallow wide bowl. The shape and size of the bowl does matter b/c you want to maximize the surface area for the rice to cool while soaking in the vinegar solution. 

Pour the vinegar mixture over, stir to coat all the grains.

Fan the rice with your hands (my Japanese friends pull out their paper fans!). You want to cool the rice while it soaks in the vinegar.  This is another finicky but important piece as it helps make the rice sticky and the right consistency. 

Use sushi rice within the next few hours. Do not refrigerate as it changes the texture (for the same reason you want leftover refrigerated rice for fried rice recipes).  So you can't make sushi rice ahead of time but you can keep it on the counter for a bit.


Temaki Method:
Over a low gas flame, swiftly and gently brush one sheet of nori over hte flame until toasted.  Moving it over is better than letting it sit as it won't crumple unevenly (another trick from host-mom!).  Toasting brings out the best flavor and texture from nori. 

Slice the toasted nori in half.

Spread a thin layer of sushi rice over a quadrant of the toasted nori.  In the center of the rice, stack your fillings:

hot smoked salmon
avocado slices

 Roll into ice cream cone shape and eat immediately.


Alternative filling ideas:
  • raw fish (buy it pre-cut at asian markets- make sure it is fresh)
  • thinly sliced cucumbers
  • daikon sprouts and tuna 

6.10.2012

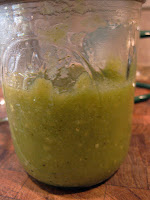
Canned Tomatillo Sauce (aka Salsa Verde)

I'm crazy about tomatillos! They are the main ingredient in verde sauce. If you're lucky you can find tomatillos for 89 cents a pound.  Anything under $3 a pound is decent. From this blog, originally from  The Art of Preserving by Rick Field and Rebecca Courchesne.

Use the canned sauce for:
METHOD
Sterilize 3 pint jars and 1 half-pint jar. 

Puree the following in blender (or food processor) to your desired chunky/smoothness. I usually have to do this in two batches to fit in the vitamix.

2.5 lbs tomatillos, husked and rinsed, then quartered
1 white onion, peeled & diced
green chiles: 2-4 jalapenos, and/or roasted poblano peppers
1 C cilantro
3 cloves garlic
1 TB fresh oregano leaves (omit if you don't have)
6 TB lemon juice
1.5 tea salt
0.5 tea fresh ground black pepper
enough water to get the blades going

Pour into large saucepan. Bring to a boil, then simmer uncovered for 20 minutes to thicken.

Ladle hot liquid into sterilized jars. Wipe rims clean, screw lids on.

Process in hot water bath canner for 15 minutes.

Yields 3 pints plus potentially a little extra.


6.09.2012

Hood Strawberry Balsamic Jam

 UPDATE: I've been making this with my friend LorisanCooks since 2009! Here's an update to our favorite recipe.  Here in Oregon, we use Hood Strawberries- which are small, round and have a wonderful musky flavor. 
Tips about Canning
As always with canning, be careful to wash everything in hot water! Before starting the jam, you will need to bring a huge canning pot full of water up to a boil. Also unpack your canning jars and wash them in the dishwasher-- leave them in the hot dishwasher until you are ready to fill. (or sterilize in boiling water for 10 minutes).
Also, fill a small saucepan with water and gently simmer the canning lids to loosen the rubber seal. These guidelines serve as a reference, if this is your first time canning, please read more in depth information from canning books or the web.

Sterilize at least 8 half pint jars (or 16 quarter pint jars).

Recipe:
Wash and hull 4 pounds of strawberries (approx 4 pints). Quarter strawberries and/or mash them. 

Add the following and let macerate for 45 -60 minutes.
3 C sugar
1/3 C lemon juice 
3 TB balsamic vinegar

Heat the mixture over high heat, stirring until it comes to a boil.

Once boiling, add 1 box of pectin "Sure Jell low sugar" (pink box), and cook for 1 minute.

Take off heat. Fill into prepared jars and process for 10 minutes, or as directed by the pectin box instructions.

This recipe makes 8 half-pint size jars of jam.


6.06.2012

Slow Cooker Yellow Thai Curry Chicken with Sweet Potatoes & Green Beans

We love Thai Yellow Curry so much that I wanted to recreate a simple (at least simple after you make the curry paste!) recipe that works in the slow cooker. Inspired by this paleo recipe.

This isn't a slam dunk recipe yet. It is pretty good but needs some tweaks!  I had put the sweet potato in at the beginning- next time I will do as written below and put the sweet potato in at the mid way point. This is also pretty sensitive to overcooking-- I wasn't watching the time and the chicken fell apart more than I would have liked.

Method:
Layer in slow cooker:
chicken thighs or drumsticks
1 white or yellow onion, sliced or diced
3 cloves garlic, smashed
2 TB thai yellow curry paste
1 can coconut milk (light coconut milk is fine)


Cook on LOW for 2-3 hours, until chicken can be removed from the bones. It shouldn't be falling off tender yet. Remove any bones/skin, shred meat into large chunks. (will take longer with an older slow cooker).

With the chicken bones removed, now add:
1 sweet potato or yam, diced 
1 C green beans, cut into 1.5 inch chunks
 more thai yellow curry paste to taste
 sugar and salt as needed to balance the flavor

Put cover back on, continue cooking on LOW for another 30 minutes to 1.5 hours-- or until the sweet potato and beans are tender. Don't overcook.

Serve over cooked basmati rice.

(Almost) Vegan Enchiladas: Zucchini, Olive, Corn & Black Beans

I've loved Amy's frozen enchiladas for a while- the kind with corn and black beans and ooey gooey veggies and sauce!  So I decided to give it a try.  These were very good- the hubby went back for seconds which is always a good sign.

Except for being difficult to get out of the pan in one piece, these would be good for a dinner party or when you have out of town guests-- since you can prep it ahead, and pull it out of the fridge and bake once they arrive.

Some recipes grate the zucchini and forgo the saute step. But I wanted to remove the extra moisture and get the taste of the filling just right before assembling.  I think it was worth the extra step.

If your family doesn't like olives, you can add them at the end to individual servings instead of to the whole batch. Just make sure to mark them with olives on top so you can identify them post-baking.

Filling:
Saute with olive oil and 1/2 tea salt until softening:
2-3 C diced zucchini
1 small yellow onion, diced
3 cloves garlic, minced
1 can black olives, chopped
optional: 2 stalks celery, sliced thinly

Now add, stir and cook until warmed through:
3/4 to 1 C frozen sweet organic corn
1/2 C or more cooked black beans (see this post on making your own beans instead of buying canned!)
1/2 tea oregano
1/2 tea ground cumin
scant 1/4 tea ground black pepper

Taste and add more seasoning or salt if needed. Turn off heat.


Assembly:
Spoon 1/4 C or less of red enchilada sauce into a pyrex pan.  Working with one whole wheat tortilla at a time, spoon the veggie mixture into the tortilla, sprinkle optional sliced green onions/scallions, roll it up, and place on top of the sauce in the pan.

Fill up the pan with tortilla-veggie bundles. 

Now spoon a thin layer of enchilada sauce over the top.  In total, I used 1/2 C or less of enchilada sauce to make 4 enchiladas.

Sprinkle cheese (dairy cheese or vegan cheese) and optional olive slices over the top.

Bake at 350 F for 15-20 minutes or until the cheese is bubbly and some parts of the sauce on the tortilla are drying out.

Serve as is, or get fancy with avocado slices, cilantro sprigs, or sour cream (dairy or vegan).

Garden Salad Wraps with Chickpeas & Tali Sauce

Similar to the chickpeas with Tali sauce over greens recipe, I threw together these wrap sandwiches to pack in the cooler.  They are vegan, and most of the ingredients are raw! It's a good way to use up veggies from the farmer's market.  I like that it's a healthy lunch I can pack with me anywhere. My non-vegan mom even approved!

Method
First make Tali sauce, or defrost it from the freezer!

Toss Tali sauce with cooked chickpeas (or canned) and chopped flat leaf parsley.

Lay out sheets of parchment paper or aluminum foil. Top each foil with ezekiel sprouted grain tortilla or whole wheat tortilla (just be careful of dough conditioners and other garbage in some conventional tortillas).

Layer on washed, torn lettuce or other greens and then veggies. I used:
  • shaved carrots
  • shaved daikon radish
  • cut snap peas
  • sliced green onion/scallion
  • avocado slices
You can substitute or add any veggies you like! Diced cukes, shaved jicama, sliced bell pepper, steamed broccoli...

Then top with 1/4 C of chickpea mixture.

Then sprinkle on your favorite spice mix like Zataar Seasoning (which has salt, pepper, sumac and sesame seeds). Make sure your spice mix has salt and pepper at a minimum.

Roll/wrap up sandwiches, closing with foil or tape.  Keep chilled and enjoy on a picnic or hike!

Quick Blender Green Juice

When I have the time to get out the juicer, and clean it afterward, I make green juice in the juicer.  The rest of the time, I use the blender! Much faster clean up when using the blender of course.

The blender yields a more fibrous juice, little more like a smoothie.  But the fiber is an important part of vegetables' cancer-fighting arsenal.  And if I get a tablespoon of really fibery stuff in the bottom of my glass I just throw it out. Removing the kale stems/stalks, and skimming the foam off with a spoon both help to remove some of the extra fiber :).

My favorite kale is Tuscan/Lacinato/Dinosaur kale.  As with any juice, the fresher the better, so don't let this sit around-- drink right away or within a couple hours.

Method
Tear off leaves from kale stems. Discard stems.

Push 1-2 C kale leaves into blender.  Add 1-2 C water.  Blend thoroughly on high.

Pour into drinking cups.  I use a spoon to skim most of the foam off and discard it.

Optionally add a squeeze of lemon juice.

Enjoy!

6.04.2012

BPA free Beans: cook and freeze your own

After all the articles in the news about BPA, and especially about BPA in canned foods, I decided to start cooking my own beans in batches and freezing them.

Surprisingly they taste much better than canned beans! Especially chickpeas- home cooked chickpeas are buttery and delicious. You can use these just as you would canned beans. 

Tips:
As long as the beans are intact (and not mushy) when finished cooking, you can drain in a colander, then pack into ziplocks and freeze.

When you're ready to use, simply microwave what you want or defrost in the fridge.

Soak the beans in lots of water overnight- this helps them cook a little more evenly. Might help with flatulence but I haven't run a controlled study to confirm that hypothesis.

There are a few options for cooking the beans:
  •  boiling at low temperatures on the stove (make sure it can sustain a low heat, otherwise the beans will split. My gas stove can't really do this)
  • simmering in a slow cooker/crock pot: beans + water in the slow cooker- with water covering the beans by at least 1 inch. Cook on LOW for as many hours as it takes- could be 6-11 hours depending on if you have a new (hot) or old (cool) slow cooker model. 
  • pressure cooking: use Miss Vickie's pressure cooking site for times and proportions. 
WARNING: not all beans are suitable for slow cooking.  I've read that kidney beans need to be boiled at a rolling boil for at least a few minutes to remove a toxin that gases digestive issues.  I've had good luck in the slow cooker with chickpeas, black turtle beans, and black eyed peas.

6.03.2012

Red Enchilada Sauce


Wanted to make black olive and zucchini enchiladas with a red sauce, similar to this recipe but with a more traditional sauce like this one from Rick Bayless.

This turned out really nice. The soaking of the chiles made them nice and smooth after blending in the vitamix (dried chiles without soaking don't do so well).  I was surprised how quickly this came together- I was able to roast the peppers and garlic over the gas flame in less than 10 minutes. Then waiting for the soaking, and after the soaking it is just blending- doesn't need to be simmered!

This is easily vegan or not vegan- just pick your broth accordingly.


Enchilada Sauce Recipe:
Roast on hot pan or over gas flame:
4 clove garlic, unpeeled
4 medium dried chiles guajillos
6 medium dried chiles anchos


Once garlic paper is blackened, remove from pan and peel.

Once peppers are puffed and roasted, dunk in water to soak for 1-3 hours (or overnight).

Drain off pepper soaking water. Remove stems and seeds from soaked peppers.

Put soaked peppers in blender with peeled garlic and all of the following, then blend until smooth:
1/4 tea black pepper
1/4 tea cumin seeds
2+ C veggie or chicken broth

1 tsp salt (to taste)
optional lime juice or apple cider vinegar
1 pinch sugar (to taste, if needed)

6.02.2012

Vegan Lasagna

This is actually very convincing for having no milk, cream, ricotta, or cheese!  I'm excited about this recipe because it will be great for when people are visiting from out of town or other big family/party gatherings.  A few reasons why this fits a special niche in my cooking repertoire:
  1. can be made/prepped ahead. Last minute preparation is heating in the oven then slicing- both are easy to do with people chatting you up
  2. generically friendly/liked food- I don't think I know anyone who hates all kinds of lasagna? It isn't the sort of thing that the random kid will turn their nose up (at least if you keep the vegan part a secret!!)
  3. cheap (ish)- noodles, sauce, veggies, tofu... not like buying take out pizza or roasting several pounds of meat
  4. I can eat it and not feel bad about it!

Method:

Buy or make your favorite tomato/pasta sauce.

Boil the lasagna noodles if they need it (some kinds don't need to be pre-cooked)

Saute veggies for veggie layer.  I like mushrooms.  Slice the mushrooms, then saute in a slight bit of olive oil and a sprinkle of salt (salt brings out the moisture which helps mushrooms cook down, and means you need less oil!)

Make the tofu "ricotta" mixture by blitzing in a food processor:
16 oz extra firm organic tofu (organic is important for tofu b/c otherwise soybeans are generally GMO)
1/3 - 1/2 lb spinach- blanched and squeezed
2 cloves garlic
1 tea salt
lemon juice
fresh or frozen basil leaves

Pick out a pan. The tofu mixture above will work for about an 8x8" pan; you could double it for a larger pan.

Layer the lasagna into a pan.  This is the order, from bottom to top:
  1. tomato sauce
  2. lasagna noodle layer
  3. tofu ricotta
  4. tomato sauce
  5. lasagna noodle layer
  6. sauteed veggies (mushrooms for me!)
  7.  ...and so on until you've exhausted your tofu ricotta
Make sure to end with a layer of noodle covered generously by sauce. If you don't get it all covered with sauce on top, it will BURN the noodles. Gross.

Bake at 350 F for 40-60 minutes.